Posts

Showing posts from 2015

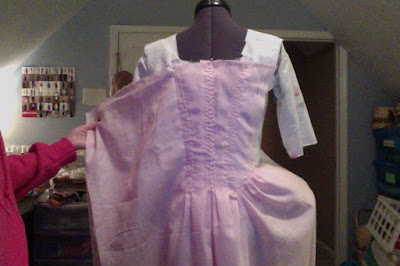
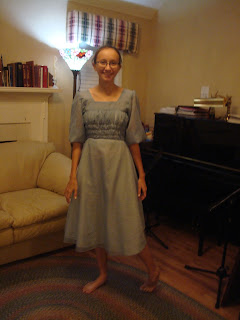
And a Dirndl... where did that come from?

Image
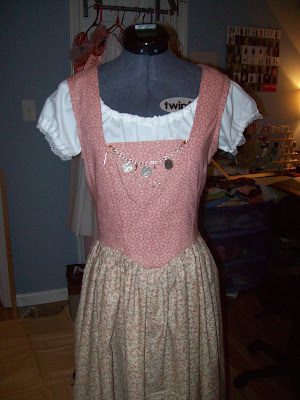
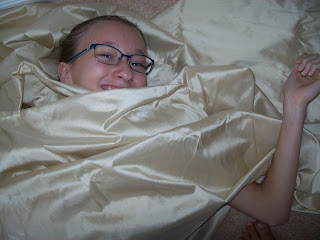
A dirndl was not on my sewing list at the beginning of this week, but here it is - almost done! My cousin from Germany came to visit, and we started talking about dirndls, and sewing in general, So I decided to make one. I just looked at some pictures, and came up with this: Thanks to my sister, I have this beautiful  Charivari chain: She is amazing - I just showed her 2 pictures and she came back with this!! more pictures:

50's Swing Dress Part 1

Image
After making Leisl's Dancing Dress , I was in a wild sewing craze, so I jumped into the sewing room, and came out with a 50's swing dress. Here are some pictures of the construction: 1. Cut out a rectangle. The length should be the length from side to side across you chest. The width should be from were you want the neckline to be down to a few inches below your waistline. 2. Pin it on the dress form wrong side out! 3. Make darts to fit the front more to come!

Pink L' anglaise

Image
Just a quick post to let you know that I'm still alive! This time of year is always busy, but somehow I found the time to make this gown. It's coming along nicely! Pleating the back: With sleeves: More pictures to come!

Leisl's Dancing Dress

Image
I can remember always longing for Leisl's pink dress when I watched the Sound of Music as a little girl. I hadn't seen the Sound of Music in a long time, so we watched it a few nights ago. That old desire for Leisl's dress turned into a need. Edelweiss patterns has a pattern for Leisl's dress and several others, (you can see it here ), but I wanted to see what I could do without a pattern before I bought one. I found a blue chiffon curtain sash in our fabric stash, grabbed my dress form, scissors and a measuring tape and got to work. I wish I took pictures of each step, but in the excitement of the moment, pictures were not a high priority.  It is far from perfect, but I like it anyway :). Now I'm going to try to write how I made this little dress. 1) I made the lining by cutting a rectangle for the front, and two for the back. I put darts in the front to make it fit, and sewed the pieces together at the side seams. 2) I made the yokes buy cutt

Francaise Update!

Image
I've pinned some trim on the edges, and finished the stomacher. I'm super happy with the fit of this dress! Here are some pictures: The stomacher Look how smooth the sides are! So super happy about that!!! Now I just need to sew the trim on, add the sleeve ruffles, hem the petticoat...

Creamy Francaise

Image
Here is another example of how I start one project before finishing another... but when I went to a thrift store and found some awesome fabric, I just had to jump headfirst into a new project. The store was having a sale on oblong table clothes, so I bought two matching ones for $3. I also found 5+ yards of raw silk for $6, so with just $9, I had enough fabric to make a francaise. I used the silk for the petticoat, and the table clothes for the francaise. I sewed it entirely by hand. This would be the first time I've worked with silk ... can you tell I enjoyed it? To make the petticoat, I cut four panels that where roughly 38"X46", and sewed them together. Two opposite panels make the front, and the other two make the sides. I pleated the front and back panels and sewed bias tape on the top to close them. For the sides, I made a casing and and used ribbon to gather the fullness around the hips. The petticoat was so big, it could be used as a

~Mitts~

Image
Yeah! My first tutorial featuring... Mitts! First you need a pattern which you can get here: 18th Century Mitt Pattern 1. Print and cut out the pattern. You may need to enlarge it, but don't  worry if it isn't perfect - it's just a guide line. 2. Cut out the fabric using the pattern, but make sure you leave about a 1/4 inch around the edges. 3. Put the mitt on your hand BACKWARDS. (With the pointy end on the bottom.) 4. Pin down the edge to fit your arm. 5. Stitch down the edge following your pinning line. try it on to make sure it fits! 6. Cut away the extra fabric on the edge. 7. Hem the top edge of the thumb, sew down the side seam. Try it on to make sure it fits! 8. With the mitt inside out and the thumb right side out, put the thumb inside the mitt through the thumb hole. 9. Pin it around the edge. 10. Stitch around the thumb. 11. Put on the mitt, and cut away the exce